Java(Spring boot)实现生成二维码_java生成二维码返回前台-程序员宅基地
技术标签: spring boot java 项目总结 SpringBoot
文章目录
一、引入spring boot依赖:
   <!--引入生成二维码的依赖-->
   <!-- https://mvnrepository.com/artifact/com.google.zxing/core -->
   <dependency>
       <groupId>com.google.zxing</groupId>
       <artifactId>core</artifactId>
       <version>3.3.0</version>
   </dependency>
   <!-- https://mvnrepository.com/artifact/com.google.zxing/javase -->
   <dependency>
       <groupId>com.google.zxing</groupId>
       <artifactId>javase</artifactId>
       <version>3.3.0</version>
   </dependency>
二、工具类代码:
import com.google.zxing.*;
import com.google.zxing.client.j2se.BufferedImageLuminanceSource;
import com.google.zxing.common.BitMatrix;
import com.google.zxing.common.HybridBinarizer;
import com.google.zxing.qrcode.decoder.ErrorCorrectionLevel;

import javax.imageio.ImageIO;
import java.awt.*;
import java.awt.geom.RoundRectangle2D;
import java.awt.image.BufferedImage;
import java.io.File;
import java.io.IOException;
import java.io.InputStream;
import java.io.OutputStream;
import java.util.Hashtable;

/**
 * 二维码生成工具类
 */
public class QrCodeUtils {

    private static final String CHARSET = "utf-8";
    public static final String FORMAT = "JPG";
    // 二维码尺寸
    private static final int QRCODE_SIZE = 300;
    // LOGO宽度
    private static final int LOGO_WIDTH = 60;
    // LOGO高度
    private static final int LOGO_HEIGHT = 60;

    /**
     * 生成二维码
     *
     * @param content      二维码内容
     * @param logoPath     logo地址
     * @param needCompress 是否压缩logo
     * @return 图片
     * @throws Exception
     */
    public static BufferedImage createImage(String content, String logoPath, boolean needCompress) throws Exception {

        Hashtable<EncodeHintType, Object> hints = new Hashtable<EncodeHintType, Object>();
        hints.put(EncodeHintType.ERROR_CORRECTION, ErrorCorrectionLevel.H);
        hints.put(EncodeHintType.CHARACTER_SET, CHARSET);
        hints.put(EncodeHintType.MARGIN, 1);
        BitMatrix bitMatrix = new MultiFormatWriter().encode(content, BarcodeFormat.QR_CODE, QRCODE_SIZE, QRCODE_SIZE,
                hints);
        int width = bitMatrix.getWidth();
        int height = bitMatrix.getHeight();
        BufferedImage image = new BufferedImage(width, height, BufferedImage.TYPE_INT_RGB);
        for (int x = 0; x < width; x++) {

            for (int y = 0; y < height; y++) {

                image.setRGB(x, y, bitMatrix.get(x, y) ? 0xFF000000 : 0xFFFFFFFF);
            }
        }
        if (logoPath == null || "".equals(logoPath)) {

            return image;
        }
        // 插入图片
        QrCodeUtils.insertImage(image, logoPath, needCompress);
        return image;
    }

    /**
     * 插入LOGO
     *
     * @param source       二维码图片
     * @param logoPath     LOGO图片地址
     * @param needCompress 是否压缩
     * @throws IOException
     */
    private static void insertImage(BufferedImage source, String logoPath,
                                    boolean needCompress) throws Exception {

        File file = new File(logoPath);
        if (!file.exists()) {

            System.err.println(""+logoPath+"   该文件不存在!");
            return;
        }
        Image src = ImageIO.read(new File(logoPath));
        int width = src.getWidth(null);
        int height = src.getHeight(null);
        if (needCompress) {
     // 压缩LOGO
            if (width > LOGO_WIDTH) {

                width = LOGO_WIDTH;
            }
            if (height > LOGO_HEIGHT) {

                height = LOGO_HEIGHT;
            }
            Image image = src.getScaledInstance(width, height,
                    Image.SCALE_SMOOTH);
            BufferedImage tag = new BufferedImage(width, height,
                    BufferedImage.TYPE_INT_RGB);
            Graphics g = tag.getGraphics();
            g.drawImage(image, 0, 0, null); // 绘制缩小后的图
            g.dispose();
            src = image;
        }
        // 插入LOGO
        Graphics2D graph = source.createGraphics();
        int x = (QRCODE_SIZE - width) / 2;
        int y = (QRCODE_SIZE - height) / 2;
        graph.drawImage(src, x, y, width, height, null);
        Shape shape = new RoundRectangle2D.Float(x, y, width, width, 6, 6);
        graph.setStroke(new BasicStroke(3f));
        graph.draw(shape);
        graph.dispose();
    }

    /**
     * 生成二维码(指定路径保存)
     *
     * @param content 内容
     * @param imgPath logo图片地址(内嵌图片)
     * @param destPath 生成二维码存放地址
     * @param needCompress 是否压缩logo
     * @throws Exception
     */
    public static void encode(String content, String imgPath, String destPath, boolean needCompress) throws Exception {

        BufferedImage image = QrCodeUtils.createImage(content, imgPath, needCompress);
        mkdirs(destPath);
        // String file = new Random().nextInt(99999999)+".jpg";
        // ImageIO.write(image, FORMAT_NAME, new File(destPath+"/"+file));
        ImageIO.write(image, FORMAT, new File(destPath));
    }

    /**
     * 生成二维码(直接将二维码以图片输出流返回)
     *
     * @param content 内容
     * @param imgPath logo图片地址(内嵌图片)
     * @param needCompress 是否压缩logo
     * @return
     * @throws Exception
     */
    public static BufferedImage encode(String content, String imgPath, boolean needCompress) throws Exception {

        BufferedImage image = QrCodeUtils.createImage(content, imgPath, needCompress);
        return image;
    }

    public static void mkdirs(String destPath) {

        File file = new File(destPath);
        // 当文件夹不存在时,mkdirs会自动创建多层目录,区别于mkdir.(mkdir如果父目录不存在则会抛出异常)
        if (!file.exists() && !file.isDirectory()) {

            file.mkdirs();
        }
    }

    /**
     * 生成二维码(内嵌LOGO)
     *
     * @param content      内容
     * @param logoPath     LOGO地址
     * @param output       输出流
     * @param needCompress 是否压缩LOGO
     * @throws Exception
     */
    public static void encode(String content, String logoPath, OutputStream output, boolean needCompress)
            throws Exception {

        BufferedImage image = QrCodeUtils.createImage(content, logoPath, needCompress);
        ImageIO.write(image, FORMAT, output);
    }

    /**
     * 获取指定文件的输入流,获取logo
     *
     * @param logoPath 文件的路径
     * @return
     */
    public static InputStream getResourceAsStream(String logoPath) {

        return QrCodeUtils.class.getResourceAsStream(logoPath);
    }

    /**
     * 解析二维码
     *
     * @param file
     *            二维码图片
     * @return
     * @throws Exception
     */
    public static String decode(File file) throws Exception {

        BufferedImage image;
        image = ImageIO.read(file);
        if (image == null) {

            return null;
        }
        BufferedImageLuminanceSource source = new BufferedImageLuminanceSource(image);
        BinaryBitmap bitmap = new BinaryBitmap(new HybridBinarizer(source));
        Result result;
        Hashtable<DecodeHintType, Object> hints = new Hashtable<DecodeHintType, Object>();
        hints.put(DecodeHintType.CHARACTER_SET, CHARSET);
        result = new MultiFormatReader().decode(bitmap, hints);
        String resultStr = result.getText();
        return resultStr;
    }

    /**
     * 解析二维码
     *
     * @param path
     *            二维码图片地址
     * @return
     * @throws Exception
     */
    public static String decode(String path) throws Exception {

        return QrCodeUtils.decode(new File(path));
    }

	//测试一:
    public static void main(String[] args) throws Exception {

        String text = "https://blog.csdn.net/weixin_43763430";
        String logoPath = "D:\\qrCode\\logo.jpg";
        String destPath = "D:\\qrCode\\csdn.jpg";
        QrCodeUtils.encode(text,logoPath,destPath,true);
    }
}
三、调用工具类生成二维码
1、将链接生成二维码图片并保存到指定路径
工具类中的主方法是指定了二维码链接的内容是博客地址,并保存在D:\qrCode\csdn.jpg,二维码嵌套了头像的图片,期望实现的是生成二维码后被扫码直接进入到博客也没。如若不嵌入头像,直接将logoPath参数设为null。
	//测试一:
    public static void main(String[] args) throws Exception {

        String text = "https://blog.csdn.net/weixin_43763430";
        String logoPath = "D:\\qrCode\\logo.jpg";
        String destPath = "D:\\qrCode\\csdn.jpg";
        QrCodeUtils.encode(text,logoPath,destPath,true);
    }
运行该主方法后,可在指定路径中看到生成的二维码图片。

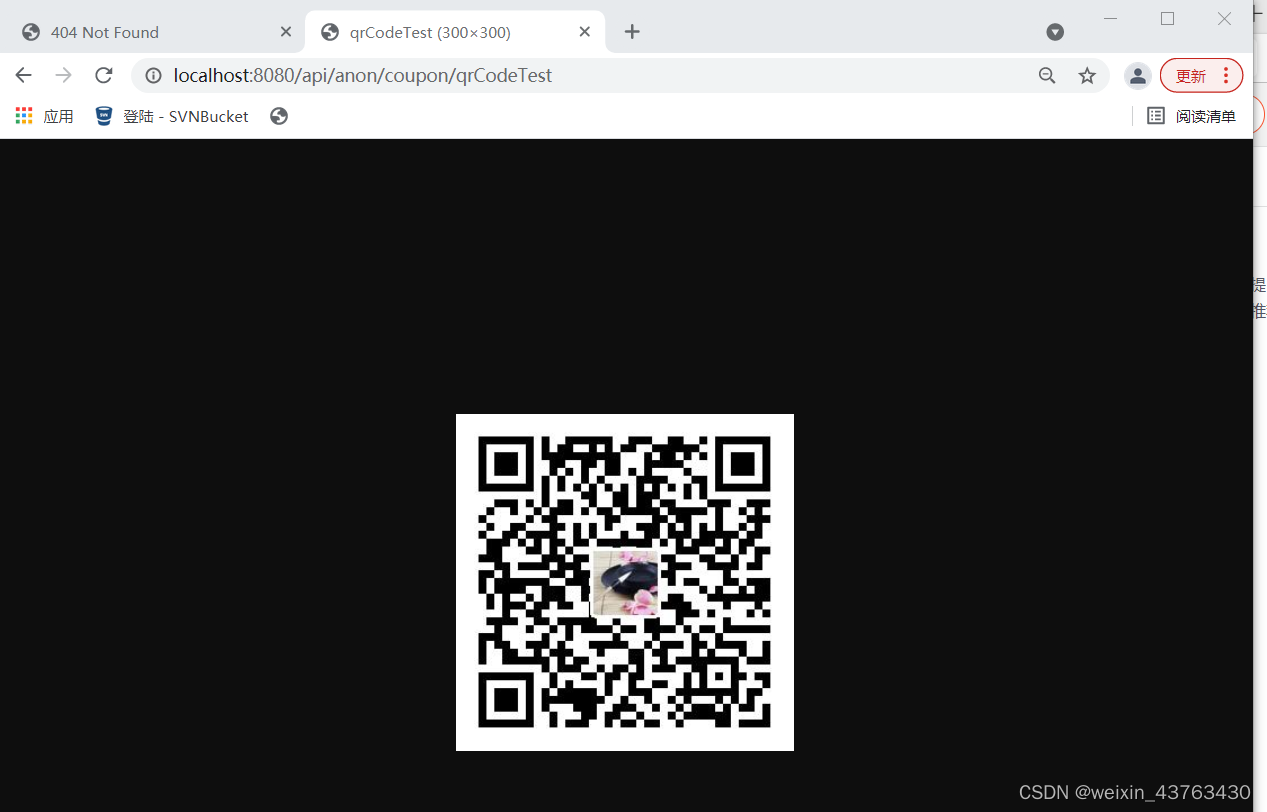
2、将链接生成二维码直接显示在页面
运用spring boot生成二维码无需将保存二维码的图片,只须前端调用springboot接口即可在页面上显示二维码。实现了实时生成二维码。Controller层接口代码示例如下:
	@GetMapping("/anon/coupon/qrCodeTest")
    @ApiOperation(value = "获取二维码")
    public void qrCodeTest(HttpServletResponse response) throws Exception {

        String text = "https://blog.csdn.net/weixin_43763430";
        String logoPath = "D:\\qrCode\\logo.jpg";
        //String destPath = "D:\\qrCode\\csdn.jpg";
        QrCodeUtils.encode(text,logoPath,response.getOutputStream(),true);
    }
打开浏览器访问该接口地址,页面就会显示生成的二维码。扫描二维码即可进入到博客页面。
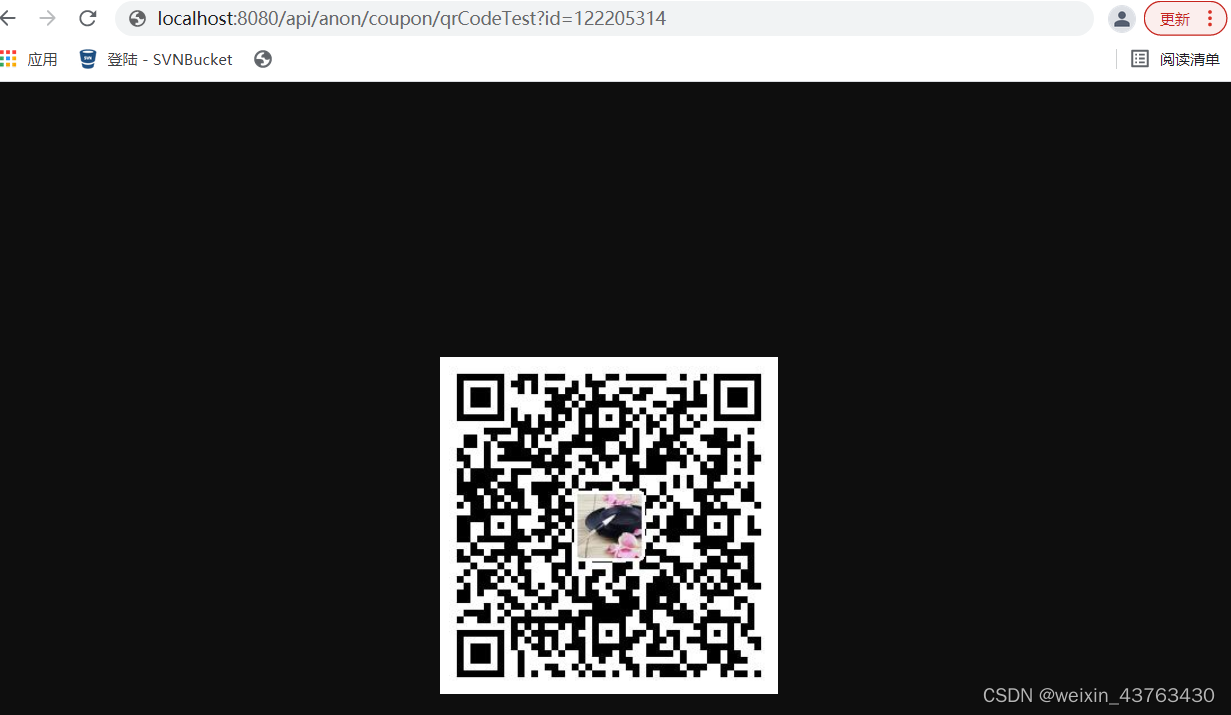
3、将以get请求传参链接生成二维码
二维码运用到各种业务中,通常需要根据不同用户识别其相对应的内容,如以上示例是访问的博客主页面,如若想根据访问者传递的参数访问博客中特定的文章,文章访问各篇文章是用的get请求方式,即可根据传参实现get请求传入不同参数生成二维码的内容不同。
	@GetMapping("/anon/coupon/qrCodeTest")
    @ApiOperation(value = "获取二维码")
    public void qrCodeTest(@RequestParam(value = "id") String id,HttpServletResponse response) throws Exception {

        String text = "https://blog.csdn.net/weixin_43763430/article/details/" + id;
        String logoPath = "D:\\qrCode\\logo.jpg";
        //String destPath = "D:\\qrCode\\csdn.jpg";
        QrCodeUtils.encode(text,logoPath,response.getOutputStream(),true);
    }
用浏览器访问该接口地址,页面生成二维码,用手机扫描二维码即可跳转到博客中该篇文章页面。
4、将以post请求传参链接生成二维码
求解???
智能推荐
linux usb虚拟网卡(NCM)_linux usb ncm-程序员宅基地
文章浏览阅读6.6k次。1. kernel config<M>USB Gadget precomposed configurations<M>Ethernet Gadget (with CDC Ethernet support) <M>Network Control Model (NCM) support2. build modulesmake ARCH=arm64 CROSS_COMPILE=aar..._linux usb ncm
Struts 应用转移到 Struts 2-程序员宅基地
文章浏览阅读1.9k次。 翻译:SpringSide团队 转载请注明出处。有很多人都很熟悉 Struts, 无论是从项目中直接获得的实战经验还是从书中了解到的。我们这一系列文章,将通过一个由 Stuts 转移到 Struts2 简单的例子向大家展现Struts2的所有特征。 在我们开始这个例子之前,你需要去知道一点 Struts2的背景知识。 在第一部分的文章中,我们将介绍Struts2与Struts的核心
计算机专业任务书案例14:基于51单片机的语音电子称设计与实现-程序员宅基地
文章浏览阅读94次。需要源码可以滴滴我。
在Windows平台上安装MRTG流量监控软件_mrtg 下载-程序员宅基地
文章浏览阅读188次。打开MRTG软件包中的"MRTG.cfg"文件,该文件是MRTG的主配置文件。打开MRTG软件包中的"MRTG.cfg"文件,该文件是MRTG的主配置文件。确保将命令中的"C:\MRTG"替换为你的MRTG安装目录和配置文件路径,"community"替换为你的SNMP团体字符串,"device_ip"替换为目标设备的IP地址。确保将命令中的"C:\MRTG"替换为你的MRTG安装目录和配置文件路径,"community"替换为你的SNMP团体字符串,"device_ip"替换为目标设备的IP地址。_mrtg 下载
kaggle简单使用教程(代码查找.下载、项目建立.运行、参加比赛)_kaggle在线写代码-程序员宅基地
文章浏览阅读1w次,点赞7次,收藏35次。Kaggle机器学习竞赛、托管数据库、编写和分享代码_kaggle在线写代码
network.service - LSB: Bring up/down networking_network.service - lsb: bring up/down networking lo-程序员宅基地
文章浏览阅读3.1k次,点赞11次,收藏14次。CentOS7突然连接不了网络,使用systemctl status network后报如下错误network.service - LSB: Bring up/down networkingLoaded: loaded (/etc/rc.d/init.d/network; bad; vendor preset: disabled)Active: failed (Result: exit-code)【解决方案】停止NetworkManager并取消开机启动chkconfig NetworkMan_network.service - lsb: bring up/down networking loaded: loaded (/etc/rc.d/in
随便推点
OpenCV图像梯度_opencv 计算梯度图像-程序员宅基地
文章浏览阅读1.7k次。目标在本章中,我们将学习:寻找图像梯度、边缘等 我们将看到以下职能:cv2.sobel(), cv2.scharr(), cv2.Laplacian()等理论OpenCV提供三种类型的梯度滤波器或高通滤波器,Sobel、Scharr和Laplacian.我们会看到他们中的每一个。1.Sobel和Scharr衍生物¶Sobel算子是一种联合高斯平滑加微分运算,具有更强的..._opencv 计算梯度图像
flutter 聊天界面+表情图片_flutter表情包插件-程序员宅基地
文章浏览阅读2.6k次。网上找了找 零零碎碎有一些文章 没找到一个整体的 自己做完记录一下 防止忘了大体就是这样聊天气泡用的是https://blog.csdn.net/oterminator12/article/details/105790961这个文章看到的然后表情用的是https://blog.csdn.net/qq_36676433/article/details/104756685这个文章看到的整体结构及底部输入/表情选择部分body下的结构主要为最外层Column,然后聊天部分用F..._flutter表情包插件
win10应用:便签 商店 xbox等打不开,报错0x800704cf_xbox0x800704cf错误代码-程序员宅基地
文章浏览阅读2.8k次,点赞3次,收藏2次。登录便签,一直报错:执行此操作需要Internet,0x800704cf。笔者网络是没有问题的,其它程序可以正常访问。解决方法关闭代理1.Win+R打开运行,输入 inetcpl.cpl 打开internet选项界面2.切换到[连接]选项,点击局域网设置。红色框选处的两个勾取消。笔者上述配置后即可解决问题。如若还不能解决,试试下面这个方法设置DNS服务器地址,首选设置为4.2.2.1 备用设置为4.2.2.2..._xbox0x800704cf错误代码
conda命令克隆(复制)环境_conda clone-程序员宅基地
文章浏览阅读8.9w次,点赞55次,收藏138次。在服务器上想要使用别人搭好的环境,但是又怕自己对环境的修改更新会影响他人的使用,这个时候可以使用conda命令进行复制环境。首先假设已经安装了Anaconda。根据已有环境名复制生成新的环境假设已有环境名为A,需要生成的环境名为B:conda create -n B --clone A根据已有环境路径复制生成新的环境假设已有环境路径为D:\A,需要生成的新的环境名为B:conda ..._conda clone
Enterprise:使用 MySQL connector 同步 MySQL 数据到 Elasticsearch_mysql connectors-程序员宅基地
文章浏览阅读3.1k次。在本文中,我们非常详细地描述如何使用 MySQL connector 来同步 MySQL 和 Elasticsearch 的索引。它使用起来非常方便。如果大家对 Logstash 很熟悉的话,请参阅我之前的文章 “Elastic:开发者上手指南” 中的 “数据库数据同步章节。我们还可以使用 Pipeline 对数据进行清洗。这个就不做展示了。_mysql connectors
HttpClientUtils工具类-程序员宅基地
文章浏览阅读1.5k次。HttpClientUtils工具类。_httpclientutils